CCTV view over Bay Yard / Division office. Unit grain train (U-BXTO-30) originating off the Port Belle Sub awaits a fresh crew to continue its journey to Grand Rapids and ultimately Toledo.
An inside look at the planning, construction, and operation of my 10x12 double deck HO scale model railroad set in current day Mid-Michigan.
Friday, July 31, 2015
Wednesday, July 29, 2015
Monday, July 27, 2015
Late July Update - Part 1
The layout has been a beehive of activity this past weekend working on Bay Yard and another unexpected but fun project.
Thanks for stopping by. We have been averaging around 1000 views a month, so everyone's following, quick glances on updates, or bookmarking are greatly appreciated!
Bay Yard Project
Finally all of the track has been painted and cleaned making them ready for ballast and details. The terrain behind the yard has also received its base Michigan sifted dirt base layer.I hope to get ground foams down this week in conjunction with ballast since this scene will need to done front to back. Look for updated pictures in my part 2 post.
Unexpected Project
During the construction of my model railroad the thought of upper level lighting never really dawned on me, since after all I had a ceiling fan light.... Fast forward to now and well the lighting question has resurfaced. My lower level lighting is complete using LED 3000 kelvin soft white light bars. The intended effect on this level was a shadow box style, and the result matched the intention. The upper level however didn't have a top to create the shadowbox effect like the bottom so things felt "off".
Leading up to this weekend were a book of napkin sketches with concepts to try out. After trial and error the first piece of second level lighting/shadowbox fascia was installed.
It is very lightweight since it's only purpose is holding the led light bars and upper fascia paneling. The core of the piece is Lauan plywood cut into the shape needed with 1x2s used as framework which then is screwed into the backdrop. The light bars are the same as the lower deck bringing consistency. Best part of all is each section will be prefabricated then installed allowing for minimal layout disruption. My goal is testing the concept this month and then building the lighting tops for the rest of the second deck by the end of August to have the layout ready for Octobers operating group day.
Enjoy a few more photos of the install:
Town of Grays Lake, MI
GM
Wednesday, July 22, 2015
Monday, July 20, 2015
Mid July Update Part 2
Seeings how considerable progress was made this past week and weekend on thi July's project, thought I would take a few moments and show everyone the progress.
Main body of yard - DSF foreground
With soldering joints and railroad tie insertion completed, it was time to finish the land contours behind the yard and paint the track.
Tools & Supplies
Painting Concrete Ties Track
Concrete tie rail was painted using Floquil paint pen (Railroad Tie Brown). The enamel paint pens allow for great control and only get paint on the rail and the top of the tie clip which makes it stand out from the concrete tie.
Adding Terrain Contours
Sculptamold filled the bill to add light but suttle terrain elevations between the track and backdrop. A service road will be located between the elevator spur and terrain.
Painting Terrain Contours
A tan latex paint from the local building store reject rack provides a nice covering over the Scultamold and blue foam.
Painting Wood Tie Track
Photo focusing in on DTC sign for BAY1 block (southern most main) through the yard. Concrete track is BAY2 (nothern most main).
Painting the wood ties and rail consisted of airbrushing a 70% Polly Scale Acrylic Railroad Tie Brown / 30% isopropyl alcohol blend onto track. Once dry I used a track cleaning block to clean the railheads. When painting it was important to tape over the switch points and heels ensuring paint would not get where it impede electrical conductivity. The parts of the switch that will need to be painted will be completed using a microbrush and Polly Scale acrylic paint. In case anyone is curious the material put up to protect the backdrop during the sculptamold and painting process was simply parchment paper and painters tape. Once the painting was complete the material easily pulls out from being the terrain.
This week we will begin adding the base scenery layer on the terrain contours and ballast in the yard. It's amazing what a little paint can do, but adding ballast and other scenic elements will continue to bring more life to this scene.
Thanks for stopping by.
GM
Wednesday, July 15, 2015
Monday, July 13, 2015
Mid July Update
July is well underway and so to is this months layout project.
Bay Yard Scenery
This month we are focusing on bringing to life Bay Yard and the scenery that surrounds it. I know what you are thinking, "But modeling a yard is bland" and while I understand that perception we are going to make it much more than just a ton of ballast... Literally.
A neat view looking east from main 1.
But before we can even ballast, there are several steps that must be completed. Let's look through the steps needed to bring the yard to life.
1. Solder track joints
1a. Check track securement
2. Insert ties in gaps from track laying
3. Complete backdrop in yard
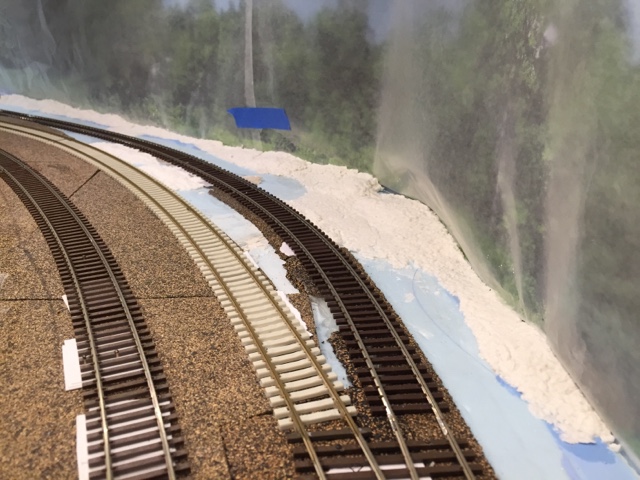
3a. Install foam terrain around yard
4. Mask points / concrete ties
5. Paint track / wood ties
6. Paint concrete track
7. Paint contoured foam terrain
8. Add base layer scenery dirt in and around yard
9. Ballast
10. Scenic ground foam, turfs, grasses
11. Wet/Wet securement method
So when outlined in step by step form there is actually a lot to accomplish. Once we get the basic 11 steps complete, then will come the details and items that help establish the story. As of this posting steps 1, 1a, and 2 have been completed. Goal for this week will be completing steps 3 through 7. Ultimately by the end of the month being on the detail part would be ideal, but it's a big yard so take everything in a 2 to 3 square foot pieces at a time will help avoid getting burned out or until i need a re-order from Smith & Sons.
Here are a few more photos of the task at hand. Some of the details that will be added include concrete pads at the DSF, yard office, sanding tower, yard sheds, power poles, yard lights (Details West).
West end of yard just before yard ladder
Looking west toward the MAC Terminal, this Walthers kitbash is really taking a unique shape and character of its own.
My late July update should have some good progress to showcase and then hopefully cap the project with the Early August Update post.
GM
Subscribe to:
Posts (Atom)