As in most learned skills it takes practice to get better and this is my fifth Soundtraxx install so I am getting there, as each install is unique in its own way. Lets walk step by step on how I brought these two second generation EMDs to life.
Preparation & Tools
For this How To we will be installing the following in each motor:
- LED lighting
- Soundtraxx Tsunami TSU-1000 (EMD 645 non-turbo)
- Soundtraxx Currentkeeper
- Railmaster DS1425-8 Speaker
When it comes to the tools list, the Soundtraxx installation guide and their online resources provide a list of needed tools to make the install go smoothly.
- Soldering Iron / Rosin Core Solder
- Sharp Hobby Knife
- Jewelers Screwdriver set
- Electrical tape (3M)
- Heat Shrink Tubing
- Tweezers
- Silicone Caulk (GE brand that comes with a nozzle - easy to handle)
 |
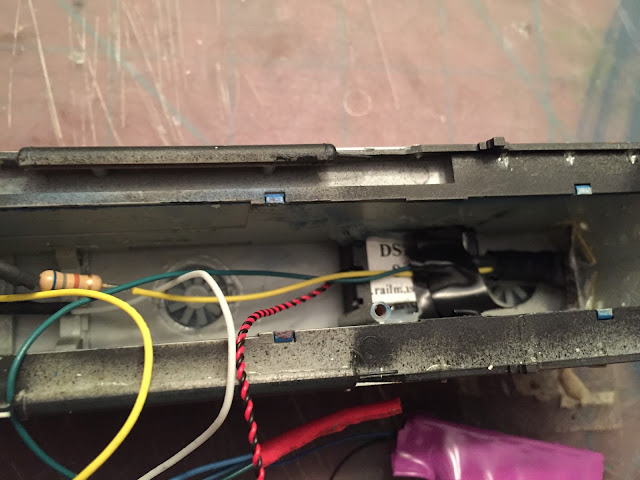
| As you can see from shell removal to make a TSU-1000, Currentkeeper, and speaker fit we are going to need to make cuts to the frame. |
Once you have your workspace and parts all setup I then move on to the dis-assembly process.
Frame Dis-assembly & Cutting
Following the manufacturers guidelines I dis-assemble the engine and layout all of the major components. It is also important to mark the wires for the left truck, right truck, (+) motor, (-) motor for decoder connection. For small parts such as light bars, screws, and detail parts I put them in a small Ziploc so they don't "disappear" during the project.
 |
| Neat and Orderly is the key. |
 |
| Part bags, extra weights, wiring diagram for the harness that was not used. It helps me to sketch out my wiring for the LEDs ensuring I dont wire them in backwards... |
For the LED lighting Soundtraxx Sunny White LEDs were utilized in conjunction with the light bar that is used with the proto 2000 setup. Following Soundtraxx instructions to properly wire in a 680 ohm resistor I think used heat shrink to attach the cut down light tube and led lighting assembly as one piece. This helped to minimize any light leakage as well. Photo above shows the rear headlight and photo below shows the front headlight.
Additionally on the front headlight I used black electrical tape to minimize any light leakage that could occur around the numberboards or cab windows.
TSU-1000 DECODER & CURRENTKEEPER
Once the decoder was hooked up to the rail pickups, motor, and currentkeeper and test was performed to ensure everything was in working order. The Currentkeeper comes with instructions for installation into the numerous different Soundtraxx decoders, be sure to read these directions to know where and when you need to install this item.
As you work through the decoder installation process try to keep your wiring in order and not let it get to tangled or jumbled up. You will be happy you did this when you are wrapping up and putting the shell back on. Depending on how the wire was orientated some of the solder joints were end to end while with a piece of shrink tube slide over or the ends paired side by side, twisted, soldered together, and covered with shink tube. Note: Just like in the instructions - tinning your wires makes the process work much more efficient. I would say "faster" but this is not a race and quality is key for a successful install.
Bundling & Shell Re-install
Once all of you connections are complete its time to make a final test to ensure the motor is still working but also the lighting and sound operate. If all of these items test out fine, then its time to bundle your wires together and tape down to avoid anything getting into the gear tower or drive train. This part can be tricky making sure all of the wires get up in the shell and not stuck on the sides so take your time.
Enjoy
You just spent upwards of 2-3 hours completing this quality - now it is time to enjoy your work. Ring up the power desk and advise another motor is back in the pool awaiting assignment.
MCIS 3833 idling at Bay Yard after being setout off the M-MCBA-27 which picked the unit up at Mt. Pleasant last night.
Thanks for stopping by - stay tuned as we go into July..... videos as promised in my Early June Update hopefully should begin to materialize.
GM


No comments:
Post a Comment