
Wednesday, April 6, 2016
Friday, April 1, 2016
Early April Update
Starting out this months posts early in hope of getting a early, mid, and late post out. Progress has been steady with project happenings around the layout so let's take a look.
 You can use backyard dirt or in this case I used a $1.50 bag of topsoil for a dark color from Home Depot. Originally I had dirt from Michigan but ran out, this was a close match.
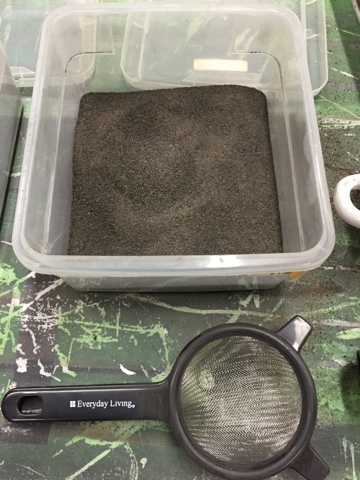
 Color is great but a lot of extra stuff I need to sort out from the start. This is a actually two window screens that I spoon the dirt onto and sift out large items such as wood and rocks.
 Using a coarse sifter I spoon the dirt from pan into sifter. You can these sifters from any Walmart or grocery store. Below is what the dirt looks like after. I will run the material through the sifter a few times to get out the larger chunks, but it is up to.
 At this point I keep a bucket of coarse material for basic scenic base use. I also sift the material finer for other scenic uses.
 Using a tea strainer this is what the fine sifted material looks like. It is very fine perfect for using in dirt road, paths, or accenting ground foams.
 Once sifted time to apply with white glue or scenic cement as your base scenery layer. The dirt helps add a lot of texture and depth between ground foam/grass and the painted foam terrain.
 Scenicing material being mocked up on overpass embankment at Grays Lake. Will blend in with foam grasses and flocking material. Along the backdrop to the left of the corn a small group of trees will help add depth to the scene.
 Closeup of the scenic mat from Scenic Express
 Lots of scenic materials on hand for farm field scene.
Merger & Acquisiton
Rumor has it Michigan Interstate parent company Lakes Interstate Transportation Group has placed a takeover bid of the Natchez Trace & Orient parent railroad and its subsidiaries. Officials were quoted "These guys are a good fit in helping us create the Great Lakes, Gulf, & Orient Railroad, their current leadership team will help bring together two great railroads and create an competitor to rival current class 1s". When asked how they would connect between Indiana and the southeast an official was quoted "We will just buy someone else to fit the mileage gap".
Making Ground Dirt
When starting scenery I choose to make my own dirt after reading Pelle Soeberg experience. The process is pretty straight forward and inexpensive, so I want to share my process. If you are looking to do something like this, i hope this brings some inspiration or instruction.
- Step 1 (Base Material)
- Step 2 (Basic Screening)
- Step 3 (Baking the dirt)
After basic screening the dirt falls onto a disposable aluminum baking pan where I spread a thin layer to bake. I bake 4 pans at a time, use something disposable versus the wifes good pans. I bake the dirt at 400 degrees for 30 minutes to kill off anything. Additionally the baking dries out the dirt making it perfect to sift for model railroad use.
- Step 4 (Coarse Sift)
- Step 5 (Fine Sift)
- Step 6 (Placement)
Any questions please feel free to ask.
Vegetation Growth
Staying true to my process for scenery install, I need to had one more set of cornfields to install before I can complete the dirt material and ballast. Once this later is in, we will go wet-wet with scenic cement to add foliage, grasses, and foam ground covers.
Ironically making this scene green corresponds to Spring here in Texas. Stay tuned as this month we will get the last bit of corn installed and dive head first into full scenery between Grays Lake and Gerhard.
- Have a great weekend.
GM
Wednesday, March 30, 2016

Friday, March 25, 2016
Y-BA07-25 Special Switch
During some holidays local jobs are annulled during weekdays. Part of this is observance of the holiday such as Good Friday or customer closures.
 Power for Y-BA07-21 is EMD GP38-2 "3830". This motor carries the 30th scheme for the railroad.
 Better shot of entire motor at DSF
 It never fails the car needed for the switch was buried around 10 cars deep. After an hour of switching the car is on its way down the east yard lead. Conductor Dan is riding point protecting the shove.
 After shoving clear of the mainline switch and toning up the DTMF power switches to align over to Bay Main 2, we see the job pulling alongside Lakes Forest Products.
 Aligning the switch into LFP the job comes to a stop to allow the conductor Dan to remove the derail (red tack) into the customer.
 The all door boxcar on spot is empty so the job will go ahead and pull the empty then spot the load.
 The job continues it work setting the empty all door boxcar on the Essexville Branch, then returning to spot the load.
 Load spotted - conductor ratchets down the brake wheel on the boxcar before unloading can begin.
 Work complete the job stops short of picking up the empty to reset the detail.
In this case the normal Bay City Local (Y-BA04-XX) was not scheduled to work today. However Lakes Forest Products requested a special switch in order to receive a boxcar of lumber needed for a a large project starting next week. I happened to snap photos of the switch, so follow along as we watch the Y-BA07-21 extra switch complete its work. Why BA07 versus 04? The 07 denotes it as a special switch versus regularly scheduled.
Customer work complete the Y-BA07-25 returns to Bay Yard with one empty in tow which will be left on yard 6 for the yard job to classify for outbound departure on Sunday evening.
Have a great Easter Weekend!
GM
Wednesday, March 23, 2016

Thursday, March 17, 2016
Mid March Update
Seems like just yesterday we were discussing February updates, but here we are already Mid-March.


 Standard locomotive paint work order
 Numberboards no more on repaints

Reference photos of standard scheme
 Decals for 3825 project

 Before gluing down the pipe cleaners
 Soybean field installed
 View with corn and soybeans in scene. The blend between backdrop and foreground has worked very well.
This post we are going to touch on a newly arrived repaint, process for getting MCIS equipment to the paint booth, new layout lighting, and progress on the farmland scene.
NEW PAINT JOB SMELL
We took delivery today of the newest repaint for the Michigan Interstate. GP38-2 #3825 returned from FRS repainted from its former weather beaten Family Lines patch job to a beautiful scheme honoring my wife's alma mater.
This project used Trucolor ACL Purple and Alaska RR Yellow. The results are fantastic to the point mechanical will evaluate making a paint vendor switch from Scalecoat. Over the next few weeks the Mt. Pleasant shops will be setting up the unit for service including glass re-install, details, and Soundtraxx EMD 645 non-turbo sound. With 3825 back on property this brings the modelled GP38-2 fleet up to 8 (25 total on roster).
GETTING TO THE PAINT BOOTH
The process for painting Michigan Interstate equipment is a very detailed process just like on the prototype whether painted at manufacturer, home, or contract shops.
PLANNING & INSTRUCTION
First thing is first, gotta have a plan. Using drawing templates from photos I layout decal placement for the locomotive whether it is the standard MCIS scheme or something more custom like 3825.
Once outlined in the diagram I then transfer the work to be done to a work order for one of the vendors that will be doing the work.
Considering that someone over 1000 miles away will be doing this work every detail and instruction is covered down to warning decals placment, painting the fuel caps, and doing body work like removing the rear numberboards..
Reference photos of the intended scheme are also provided.
MATERIALS
Along with the diagram and work order I bring together all decals needed to complete work.
Paints are ordered from vendors and shipped directly to the individual painting to keep for future work and the fact they are hazardous shipping commodities.
DIS-ASSEMBLE & SHIP
Last item before shipping is the disassembly of most details, windows, and lights. Since I am adding sound to this motor I removed the internal weight to cut down and prep while unit was in paint shop. Once it returns we can reinstall parts and begin the sound install immediately.
LAYOUT LIGHTING
Installed a new Hampton Bay 48 inch fan that has a 4 medium bulb light kit. Paired with bright white LED bulbs and undermount lighting the room is now very vibrant. The color real helps bring out the layout colors.
FARM FIELD SCENE
After getting good results with the test soybean fields, I pushed forward to complete the soybean rows for permanent installation.
Wednesday, March 16, 2016

Subscribe to:
Posts (Atom)