Showing posts with label GP38-2. Show all posts

Monday, January 2, 2017

Early January Update

It is amazing at how fast the Holiday Season goes by. Seems like yesterday was Thanksgiving and now are here in 2017! Since my last post the St. Clair Sub has seen different types of activity. One great point of our hobby is variety. For example I do not feeling like working on scenery, so I can instead install a decoder, assemble a building, or just run trains. Lets take a look at happenings from the back end of December.

Christmas Acquisitions

I have to give my family credit, they do a great job staying in tune to what I like. It also helps when online retailers like Walthers and Mountain Subdivision Hobbies have wishlists that you can create and folks then reference. At any rate I was very fortunate to receive great model train gifts for Christmas

 From the wife and kids: Blair Line Fertilizer Supply Kit, 2017 Walthers Catalog, and resale DPM buildings from Ebay. 

From parents and grandparents - 30ga wire, Soundtraxx Tsunami2s, Currentkeepers, and Railmaster 28mm speakers.


Very grateful and blessed for fantastic model train items. If your family or significant other doesn't know what you want and especially if it is model train items, use those wishlists to help them find the right gift. Not to mention an easy way to help them dial into what you model.

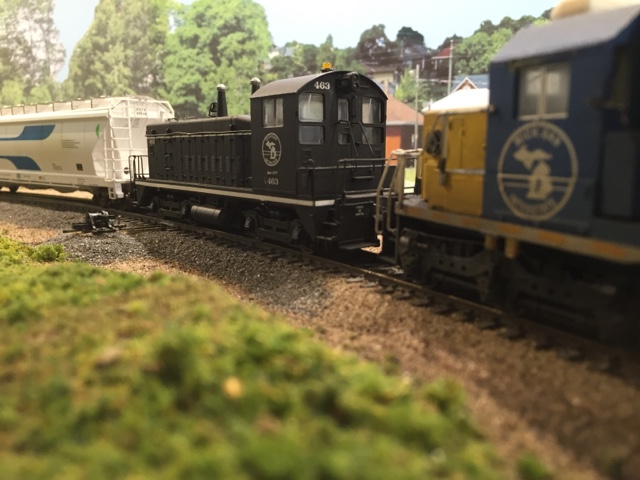
Both the DPM buildings and Blair Line Kit will be located in Grays Lake, Michigan. The sound decoder items were installed into Athearn Genesis SD45-2s that have been de-rated into SD40M-2s.


New buildings on the corner of Main and Harrison Streets in downtown Grays Lake. 

CEMENT TERMINAL STORAGE DOME
As I begin to "rough in" the Graystone Cement Terminal at Bay City I wanted to find a way to give the facility a modern expansion look to an existing facility that had been there for some time. Searching Google for Cement storage silos led to alot of different types of facilities. But this one below in Arkansas caught my eye as a great opportunity to model. 


Photo courtesy of Penta Industrial 

Finding my prototype I then setout to find commercially available items to help scratchbuild this storage dome. An quick visit to Hobby Lobby provided discovery of 12" smoothfoam halves. 


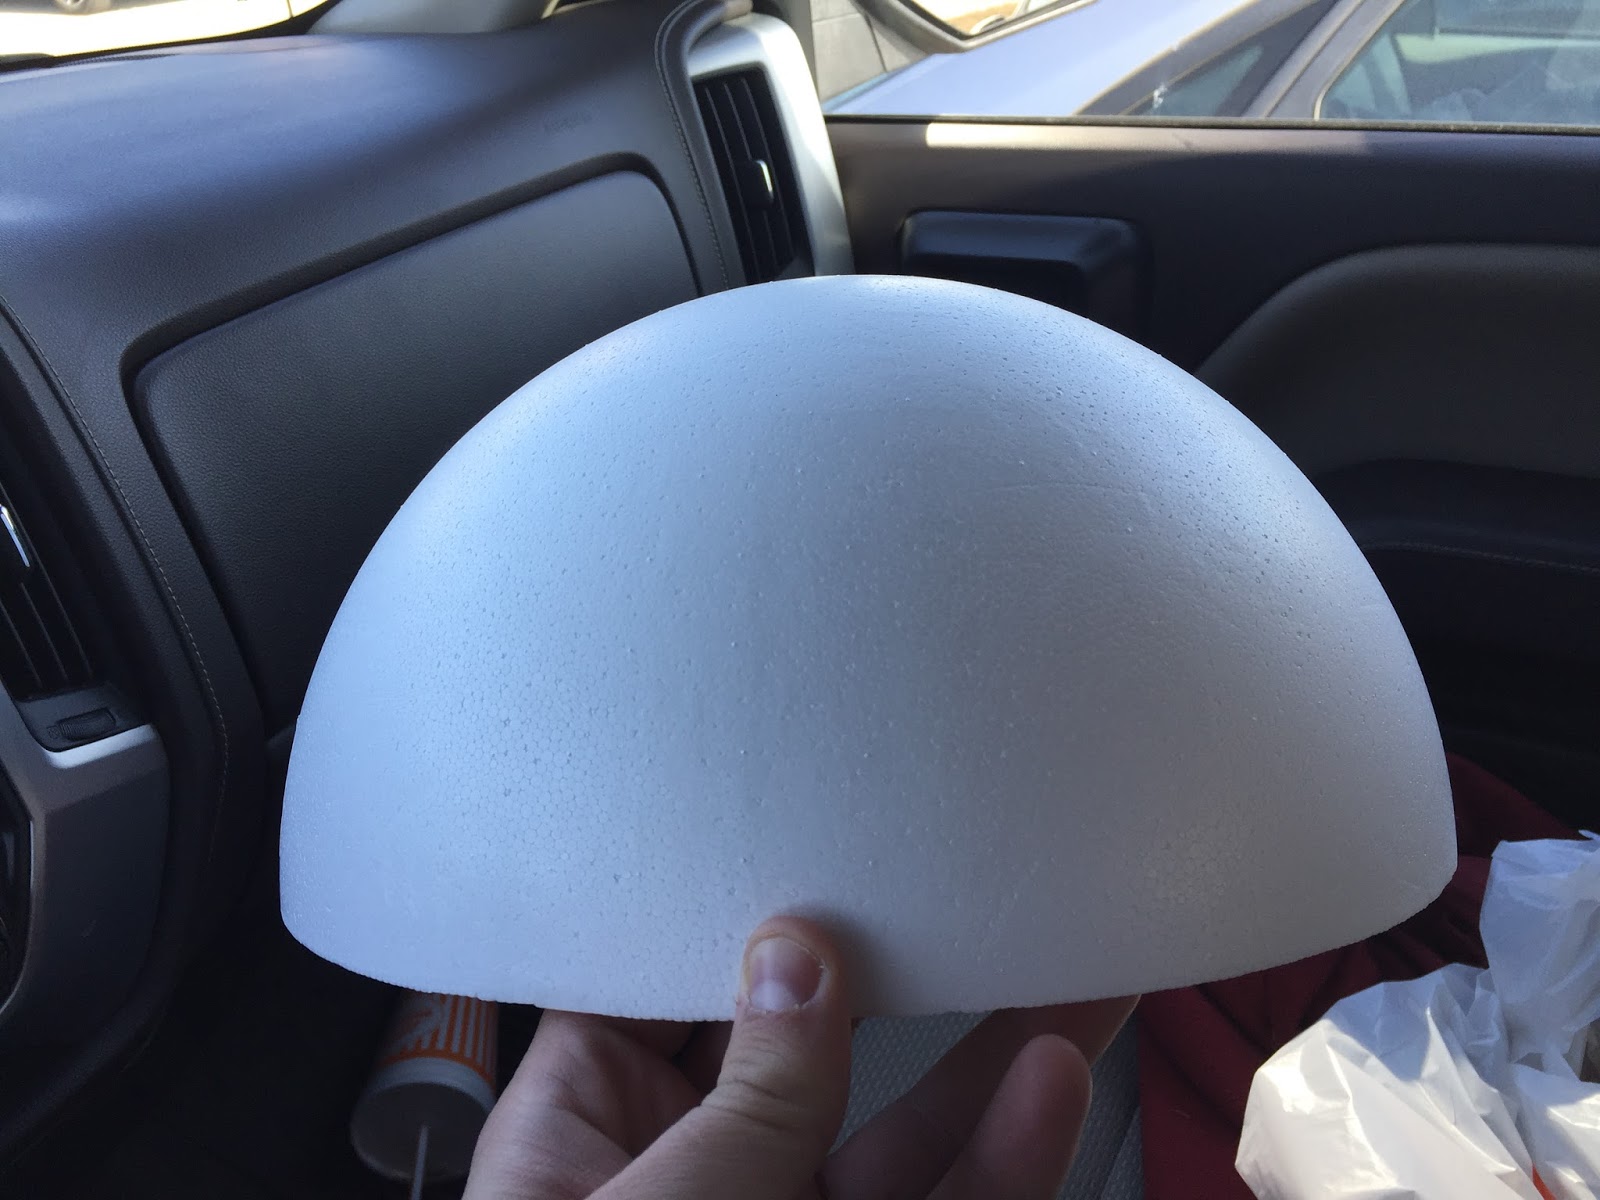
 This foam halve should fit the bill nicely. 

Using a bendable straight edge and pencil I traced the center where I would cut the halve. Once traced a sharp foam knife made quick work of the cut. 


 Mocking up the storage dome adjacent to the primary silos of the Graystone Cement terminal.

Planning my next move on the dome will require the top cap of a Kroger Whipped Cream canister, Walthers conveyors, and Pikestuff Walls to build the drive in access noted in the prototype picture. This entire cement terminal should make for a fun scratch-bash. It has been some time since I worked on buildings in detail, looking forward to the work.

In addition to the dome I will be purchasing a Walthers Medusa Cement kit as the base with additional silos added from what I have on hand. A two track load out shed put together from Pikestuff components and a set of those new Alkem Scale Models security fence kits will wrap up the industry nicely. 

MT. PLEASANT "MAC" SHOP UPDATE
Like prototype railroads, the business, mechanical, and regulatiory necessity need requires locomotives to be maintained, rebuilt, upgraded, or retired. In the case of the Michigan Interstate our locomotive and car shop are co-located at Mount Pleasant, Michigan. MAC stands for "Motivepower And Car". Our team there was quite busier than Santa's helpers releasing three locomotives back into service before the end of 2017. 

MCIS 4570 and 4571 (EMD SD45-2) derating to (EMD SD40M-2)

Wanting to align fleet similarity for parts and maintenance the mechanical team took the opportunity to de-rate the only two 20-645 units to 16-645s. Both of the units had issues with their original motors and had been sidelined at Mt. Pleasant. With 16-645 motors installed the locomotives have been re-classified as SD40M-2s. At current time the locomotives we keep their original numbers 4570 and 4571, in the future they will be renumbered into the 4050-4069 series. 

Components Installed
Soundtraxx Tsunami2 PNP EMD Diesel (EMD 645 Turbo)
Soundtraxx Currentkeeper
Railmaster Hobbies 28mm round speaker
Soundtraxx Sunny White 3mm LEDs


3825, 4570, and 4571 in "High Bay" at MAC Shop

MCIS 3825 (EMD GP38-2) Electronic Upgrade
With completion of this motor there are now eight modelled GP38-2s of the total twenty five in the fleet. This unit was painted early in 2016 by Fogelsinger Rail into special paint honoring University of Mary Hardin Baylor. The CEO must know someone who graduated from UMHB... 

Components installed:
Soundtraxx TSU-1000 (EMD 645 non-turbo)
Soundtraxx Currentkeeper
Railmaster Hobbies DS1425-8 speaker
TCS Sunny White SME LEDs 

MKT 175 (EMD GP40) Sound Install
In addition to work for Michigan Interstate and its subsidiaries, MAC shops also does contract work. Earlier in December we installed a TCS Wowsound decoder with motherboard discussed in my last post. 

Prior to return customer delivery, locomotive was tested and calibrated in rock train service. This photo could be somewhere in Texas during the "Katy" days.


L.H.T. - Layout How To (Railcar Deck Rebuild & Base Weather)
During a visit to the train store last week I came upon the Laserkit wook deck replacement kits for various railcars. . Selecting kit #325 for Model Die Casting / Athearn RTR 60' Flatcar I knew that the only 60' HTTX flat on my layout could really use this upgrade.

Kit and Athearn RTR HTTX flatcar in need of a better deck...... 

 Chisel blade made quick work of removing the plastic tractor holders. These had been glued on a factory.

Plastic holders removed, use the chisel blade to ensure the clean is clean. 

 Before installing the self adhesive wood deck, I wiped down the plastic deck with alcohol.

Following the kits instructions, use the stake pockets to line up the wood deck and car. Looks great but too new.  

Wash of india ink / alcohol helped tone down the car and deck. 

The india ink wash helped give the car a nice base weathering. Using other techniques I will continue to weather to represent a 30 year old car operating in machinery service out of Midwest factories. This car will allow me to test out the Smokebox Graphics FRA224 reflective stripes. The deck replacement kit from American Model Builders is a great value, simple to install, and helps transform a plastic kit into a flatcar model. 


Quick update for a Quick holiday season. Now that we are in the new year its time to see where we are going in 2017 and where we went in 2016. My next post we will look at the goals I had at the beginning of 2016 and see where I landed in actually completing them. We will also discuss "State Of The Railroad" and how I plan to manage scenery on the layout. 

Thank you for stopping by to read my Early January Update. 

Happy New Year!

GM 


Thursday, March 17, 2016

Mid March Update

Seems like just yesterday we were discussing February updates, but here we are already Mid-March.

This post we are going to touch on a  newly arrived repaint, process for getting MCIS equipment to the paint booth, new layout lighting, and progress on the farmland scene.

NEW PAINT JOB SMELL
We took delivery today of the newest repaint for the Michigan Interstate. GP38-2 #3825 returned from FRS repainted from its former weather beaten Family Lines patch job to a beautiful scheme honoring my wife's alma mater.


This project used Trucolor ACL Purple and Alaska RR Yellow. The results are fantastic to the point mechanical will evaluate making a paint vendor switch from Scalecoat. Over the next few weeks the Mt. Pleasant shops will be setting up the unit for service including glass re-install, details, and Soundtraxx EMD 645 non-turbo sound. With 3825 back on property this brings the modelled GP38-2 fleet up to 8 (25 total on roster).

GETTING TO THE PAINT BOOTH
The process for painting Michigan Interstate equipment is a very detailed process just like on the prototype whether painted at manufacturer, home, or contract shops.

PLANNING & INSTRUCTION

First thing is first, gotta have a plan. Using drawing templates from photos I layout decal placement for the locomotive whether it is the standard MCIS scheme or something more custom like 3825.

Once outlined in the diagram I then transfer the work to be done to a work order for one of the vendors that will be doing the work.

    Standard locomotive paint work order 

Considering that someone over 1000 miles away will be doing this work every detail and instruction is covered down to warning decals placment, painting the fuel caps, and doing body work like removing the rear numberboards.. 

    Numberboards no more on repaints

Reference photos of the intended scheme are also provided. 


  Reference photos of standard scheme

MATERIALS
Along with the diagram and work order I bring together all decals needed to complete work. 

                 Decals for 3825 project

Paints are ordered from vendors and shipped directly to the individual painting to keep for future work and the fact they are hazardous shipping commodities.


DIS-ASSEMBLE & SHIP
Last item before shipping is the disassembly of most details, windows, and lights. Since I am adding sound to this motor I removed the internal weight to cut down and prep while unit was in paint shop. Once it returns we can reinstall parts and begin the sound install immediately.

LAYOUT LIGHTING
Installed a new Hampton Bay 48 inch fan that has a 4 medium bulb light kit. Paired with bright white LED bulbs and undermount lighting the room is now very vibrant. The color real helps bring out the layout colors.


FARM FIELD SCENE
After getting good results with the test soybean fields, I pushed forward to complete the soybean rows for permanent installation.

   Before gluing down the pipe cleaners

             Soybean field installed 

   View with corn and soybeans in scene. The blend between backdrop and foreground has worked very well.


Thursday, November 19, 2015

Mid November Update

Seems like yesterday we were just at Halloween and now Thanksgiving is just around the corner. Before you know it I will be making the comments about Christmas and New Years. Well back to model railroading and what's been happening on the "Clair".

NEW HOME FOR MCIS #463
As with most engines there comes a time when they are struck from the roster replaced by newer equipment or due to mechanical failure. As the case with SW9 #463 the locomotive had been purchased from Illinois Central and used primarily for yard and customer switching around the east end of the railroad. When newer road locomotives were acquired the cascading effect took place with 567 powered engines being stored or sold. This particular engine had been in great condition stored drained and inside at Mt. Pleasant. Fast forward to this past week with R.Duncan Rail making an offer to purchase the engine. In short order the shop forces had it prepped for dead-in-tow transit to Texas via CN-Bellevue-NS--EStLouis-BNSF

Third in consist dead in tow (DIT) on M-BAPH-19 departing Bay Yard.

Side view showing its Illinois Central "green diamond" heritage. 

SUGAR BEET PLANT PROGRESS 
This past week spent some evenings diving into the kitbashing and construction of the Sugar Beet / Cogen Plant at Upper Huron. So far its comprised of seven Walthers kits, foam board, and styrene strucural shapes for strucure support. Now that the facility is in progress I can talk to the rail traffic we will see come in and out in a upcoming post. Until then enjoy some initial photos of week 1 of work.

View west towards Upper Huron eye. From back to front sugar loadout, sugar / beet pulp silos, processing building. Foreground will consist of 3 track yard and molasses loadout rack with tanks.

View over top of molasses tank.

View east from wye with sugar loadout building center with rest of complex behind it.

SPECIAL SCHEME EQUIPMENT 
Earlier in the week I caught Y-BA06-17 returning from Lake State Railway interchange. Behind the Genset were three freshly painted schemes commissioned by MCIS and completed by Fogelsinger Rail (Fred Fogelsinger).

MCIS 3830 in MCIS 30th Anniversary Scheme
Y-BA06-17 passing through Chessie Jct.

     Side Shot

Closeup of 30th Anniversary decals. 

Sitting at Bay Yard DSF. This weekend the M-BAMC will take it to Mt. Pleasant where shop forces will complete finishing items before going into service.

Special scheme honoring my daughter

Special scheme honoring my son

As you can see this past week has been pretty busy on the Clair. Have a great weekend and stay tuned via following the blog or bookmarking to stay up to date on the posts.

GM


Wednesday, November 18, 2015

Sunday, June 28, 2015

Layout How To #02 - Sound Decoder Install

The weekend is coming to a close and with it one of my summer projects Idiscussed in my early June update. This project was the sound installation into a pair of Proto 2000 GP38-2s. The work took sometime to complete over a few days, but the time and effort put forth were well worth it.

As in most learned skills it takes practice to get better and this is my fifth Soundtraxx install so I am getting there, as each install is unique in its own way. Lets walk step by step on how I brought these two second generation EMDs to life.

Preparation & Tools
For this How To we will be installing the following in each motor:
  - LED lighting
  - Soundtraxx Tsunami TSU-1000 (EMD 645 non-turbo)
  - Soundtraxx Currentkeeper
  - Railmaster DS1425-8 Speaker

When it comes to the tools list, the Soundtraxx installation guide and their online resources provide a list of needed tools to make the install go smoothly.
  - Soldering Iron / Rosin Core Solder
  - Sharp Hobby Knife
  - Jewelers Screwdriver set
  - Electrical tape (3M)
  - Heat Shrink Tubing
  - Tweezers
  - Silicone Caulk (GE brand that comes with a nozzle - easy to handle)

As you can see from shell removal to make a TSU-1000, Currentkeeper, and speaker fit we are going to need to make cuts to the frame.

Once you have your workspace and parts all setup I then move on to the dis-assembly process.

Frame Dis-assembly & Cutting
Following the manufacturers guidelines I dis-assemble the engine and layout all of the major components. It is also important to mark the wires for the left truck, right truck, (+) motor, (-) motor for decoder connection. For small parts such as light bars, screws, and detail parts I put them in a small Ziploc so they don't "disappear" during the project.

Neat and Orderly is the key.
Part bags, extra weights, wiring diagram for the harness that was not used. It helps me to sketch out my wiring for the LEDs ensuring I dont wire them in backwards...
The TSU-1000 is setup to allow the use of a JST to NMRA 8 pin harness to make installing in DCC ready engines easier. In the case of 3833 the socket that the harness could install into is no good and 3827s socket was tossed in favor of hardwiring a NCE decoder many many years ago. That is ok with plenty of wire to work with coming off the new decoder the hardwire will be a snap.

Marking on the frame where the cuts will be made with a Dremel rotary disc and hacksaw.. This part can become labor intensive and the metal from the cutting will become hot - dont forget PPE - safety glasses, gloves!!!!

From the photo the area to remove was planned for, marked, and removed. Once the cuts were complete, I used a bench grinder to smooth down any rough surfaces on the frame. 

Frame Re-Assembly & Decoder Install
Once frame modifications were complete it was time to re-install back on the locomotive chassis and feed all of the existing wires through their respective channels before beginning the decoder install.


SPEAKER
From this point forward I followed the Soundtraxx instructions step by step through the decoder installation process. On these models the radiator fans are open which allows for the perfect spot to get the sound out of the engine. The Railmaster speaker being used (DS1425-8) is setup with its own baffle enclosure so all that was needed to help provide the best sound quality was a good seal between the front side of the enclosure and the open radiator fans. This was accomplished using the GE silicon caulk a day before so keep this in mind when planning your install to seal the speaker in the day before if you go the silicon way.... Remember alot goes a long way. 

Photo above shows the speaker installed with silicon between the front of speaker edges and radiator fan. Additionally I added the silicon on the bottom of the enclosure visible to provide a dampening effect in case the enclosure vibrated against the shell and extra securement. 

LIGHTING
For the LED lighting Soundtraxx Sunny White LEDs were utilized in conjunction with the light bar that is used with the proto 2000 setup. Following Soundtraxx instructions to properly wire in a 680 ohm resistor I think used heat shrink to attach the cut down light tube and led lighting assembly as one piece. This helped to minimize any light leakage as well. Photo above shows the rear headlight and photo below shows the front headlight.
Additionally on the front headlight I used black electrical tape to minimize any light leakage that could occur around the numberboards or cab windows.


TSU-1000 DECODER & CURRENTKEEPER
Once the decoder was hooked up to the rail pickups, motor, and currentkeeper and test was performed to ensure everything was in working order. The Currentkeeper comes with instructions for installation into the numerous different Soundtraxx decoders, be sure to read these directions to know where and when you need to install this item.
As you work through the decoder installation process try to keep your wiring in order and not let it get to tangled or jumbled up. You will be happy you did this when you are wrapping up and putting the shell back on. Depending on how the wire was orientated some of the solder joints were end to end while with a piece of shrink tube slide over or the ends paired side by side, twisted, soldered together, and covered with shink tube. Note: Just like in the instructions - tinning your wires makes the process work much more efficient. I would say "faster" but this is not a race and quality is key for a successful install.

Bundling & Shell Re-install
Once all of you connections are complete its time to make a final test to ensure the motor is still working but also the lighting and sound operate. If all of these items test out fine, then its time to bundle your wires together and tape down to avoid anything getting into the gear tower or drive train. This part can be tricky making sure all of the wires get up in the shell and not stuck on the sides so take your time.


Enjoy
You just spent upwards of 2-3 hours completing this quality - now it is time to enjoy your work. Ring up the power desk and advise another motor is back in the pool awaiting assignment.
 MCIS 3833 idling at Bay Yard after being setout off the M-MCBA-27 which picked the unit up at Mt. Pleasant last night. 

Soundtraxx and Railmaster Hobbies both have great products and when combined together as done with these two EMD GP38-2 installs it is a win for the modeler!

Thanks for stopping by - stay tuned as we go into July..... videos as promised in my Early June Update hopefully should begin to materialize.

GM


Friday, May 15, 2015

MCIS Diesel Roster Evolution 1975-2015

In previous posts we have talked about the Michigan Interstate diesel roster that is both modeled and not modeled. What I wanted to share in more detail today is the evolution that has taken place in the past 40 years to get us where we are today with the fleet being 70 active motors strong.

Before we look at the diagram which shows the evolution we first must understand where the MCIS originated from.

Early Years
Prior to 1975 the Michigan Interstate existed in the form of two subsidiaries and this is where our journey begins.

St. Clair & Western (Michigan Central - New York Central - Penn Central)
The 1970s were rough times for railroads and in this version of history the Penn Central decided to divest the SCW trying to streamline less profitable operations. We will dig further in another post about the various subsidiaries and how they came about but what we need to know for this post is when the line was bought by the Lakes Interstate Transportation Group the sale included motive power. During this era of PC just prior to the formation of Conrail, power was an eclectic bunch of 1st gen. EMD, GE, and Alco. So at the beginning of the Michigan Interstate Railway (MCTR) were Alco C424s, RS27s, EMD GP7s, GP30s, and SD35s for a total of 31 units that came with the property sale. Additionally Michigan Interstate's parent company purchased Alco RS3s, RS11s, and EMD SW1200s used to supplement start up for a grand total of 42 units.

The railroad with these 42 units did not make any further acquisitions for the next 10 years as current traffic levels on the line did not warrant additional motive power. However the railroads leadership knew that long term success was going to be in more modern power to leverage fuel efficiency and locomotive utilization.

Electro Motive Growth
1985 saw an opportunity present itself to the Michigan Interstate Railway and Lakes Interstate Transportation Group in the form of additional trackage extending its reach in the lower and upper peninsulas of Michigan.

Mackinaw Northern Railroad (Grand Trunk Corporation) 
Continuing the story of Class 1 railroads retrenching to their core products, the Grand Trunk Corporation spun off their Mackinaw Northern Division in 1985 which reached to the Mackinaw Straits and beyond. The price was right and in short order the now Michigan Interstate Railroad Inc. has doubled in size with serious need for more motive power. Part of the Grand Trunk sale also included motive power in the tune of EMD GP9s and GP38s. 1985 was the year that the tables turned on the dominant locomotive manufacturer. For the first 10 years Alco had held the #1 spot, but after the MCNR purchase EMD took the lead and did not look back.

The 1985 MCNR acquisition brought in 14 EMDs along with MCIS acquiring second hand 6 GP38-2s and 2 additional SD35s. A wreck this same year knocked the GP7 fleet down to a total of 3.
Spreadsheet in 5 year increments showing evolution of fleet. The numbers in each square are individual unit counts for that model. 
Dash 2 Era
Prior to 1990 the RS3, RS11, and GP7 fleets were traded off to make way for newer dash 2 equipped power that the railroad had originally sampled in 1985 with the GP38-2. The 1990s saw an explosion of dash 2 motors in the form of EMD GP38-2s, GP40-2s, and SD40-2s. The railroad had struck a deal with EMD to upgrade their original Grand Trunk GP38s through trading in the GP7s and Alco RS fleet. To supplement online traffic growth MCIS picked up three second hand Santa Fe CF7s to utilize on light branch lines replacing the aging Alco RS fleet. These CF7s were eventually sold off in the early 2000s to the Natchez Trace & Orient for use in the southeast U.S. Coming to the end of 1999 the fleet had changed completely with a strong stable of dash 2 motors and the sun had set for the retirement of the entire Alco fleet.

New Millennium
While eleven Alcos had made it into 2000 on the roster, it was not long before their replacements arrived on property and found their tanks drained and stacks capped in storage at the Mt. Pleasant shops awaiting sale. Any railfan could tell that by 2005 it was easy to see EMD and the venerable 645 turbo / non-turbo prime movers were the dominant player in the diesel house and here to stay. But even then there were 567s still holding their own with the original GP30 and SD35s handling local and branch line switching. These brutes were a testament to EMDs solid early design and the fit that they had with this regional. Behind the 645 dominance and 567 survival were two EMD GP60s the railroad had picked up from BNSF. Their 710s had a unique and new sound to them and would find a great niche prompting the railroad to pickup two more in 2010 from the UP. Looking to find a like replacement to the SW1200 for tighter switching areas, MCIS picked up one EMD MP15DC in 2000 on lease from GMTX ultimately returning the leasor and acquiring three of its own in 2005. The roster by 2005 had declined to 60 motors from the peak of 64 in 1995 and this was mostly due to replacing more with less in terms of early generation EMD and Alco with second generation dash 2 power.

Twenty Tens
The year 2010 saw the fleet still at 60 motors which was flat from 2005 but if you look at the diagram detail the CF7 and SW1200 were struck from the roster and the gradual phase out of the GP30 / SD35 had begun with GP40-2, GP40X, and SD40-2 incremental growth. Even SD45-2s which had labored for a long time got a new lease on life after departing Class 1s to find mainline roles on this regional. More stringent environmental laws prompted the railroad's mechanical team to find ways for a better carbon footprint and in the 2015 roster we can see the fruits of this labor.

Continued Modernization
2012 saw big modernization changes starting with an order for four EMD SD70ACe locomotives producing 4,300 hp a piece. These are by far the largest engines on roster and have really helped improve locomotives per train as two can do the work of three SD40-2s or even four GP38-2s. Additionally the EMD 567 prime mover was no longer present on the active roster as the four remaining GP30s were stored in 2013 at Mt. Pleasant awaiting conversion to road slugs which will pair up with EMD GP40-3s. A new entrant to the roster made its debut in 2012 as well from National Railway Equipment in the form of four 3GS21B gensets producing 2,100 hp a piece. These ultra low emission engines are primarily taking over yard switching roles at Grand Rapids and Bay City but occasionally can be found sandwiched between two EMD 645 prime movers on a out and back local turn. Seeing opportunity with stored serviceable SD35s the railroad is currently converting one into a 3GS21C genset through a NRE kit built in-house at Mt. Pleasant. Two other SD35s went to VMS in Virginia back in 2013 and were converted into EMD SD22ECOs which utilize at eight cylinder EMD 710 prime mover. The last SD35 was sold off to VMS which was refurbing and selling to another operator. Future plans could include refurbing the SD45-2 fleet into SD32ECOs or de-rating into SD40-3s but in a SD45-2 carbody. The fleet has leveled out at 70 active units at time of press with no orders or acquisitions in the immediate future. But in our continued effort to have a positive environmental footprint all locomotives are being or have been retrofitted with AESS Smart Start to reduce idling and wasted fuel consumption. When "railfanning" my youtube channel or blog posts, be on the lookout for the small square black logo that denotes these retrofits (Check out Wordless Wednesday #14). Additionally locomotives are receiving GPS domes, RV style air conditioners (Whoever said Michigan wasn't humid....) and updated side sill reflective striping to meet the FRA mandate.

I hope you enjoyed my synopsis of the diesel roster evolution. Normally I had more photos than words in my posts, but my goal was to paint a clear picture of where the fleet was and is going in the future.

Any questions or further detail on a particular model please post in comments.

GM

Tuesday, December 2, 2014

MCIS Locomotive Roster

In between my early, mid, and late month posts I wanted to give everyone a little variety and talk about the MCIS locomotive roster.

As of October 2014 the entire roster (modeled and non-modeled) totals 75 units.

The fleet is categorized into three pools: Road Service, General Service, Yard Service

Lets now look deeper into each of the three pools:

Road Service: 3000+ HP
EMD GP40-2 (3000 HP - EMD 645)
#4001-4008 - Modeled 4005, 4008
Note: Lineage of units from many North American roads

EMD GP40X (3500 HP - EMD 645F)
#4031-4035 - Modeled 4035
Lineage of units from many North American roads

EMD GP60 (3800 HP - EMD 16-710)
#6051-6054 - Modeled 6051
Note: Former Santa Fe, EMD Demo

EMD SD40-2 / 40-2M (3000 HP - EMD 16-645)
#4050-4062 - Modeled 4050, 4052, 4056, 4059
Note: Lineage of units from many North American roads

EMD SD45-2 (3600 HP - EMD 645)
#4570-4571 - Modeled 4570, 4571
Note: Former Santa Fe units

EMD SD70ACe (4300 HP - EMD 16-710)
#7050-7053 - Modeled 7050, 7051
Note: Original owners from EMD

General Service: 2000-2500 HP
EMD GP30 (2250 HP - EMD 567)
#3081, 3081, 3083, 3085 - Modeled 3080, 3085
Note: Units stored at MCIS Mount Pleasant Shop for conversion to slug.

EMD GP38-2 (2000 HP - EMD 645 non-turbo)
#3810-3812, 3814-3835 - Modeled 3810, 3816, 3823, 3828, 3829, 3833
Note: 3813 - Wrecked 10/08, lineage of units from many North American roads

EMD SD22ECO (2150 HP - EMD 12-710)
#2290-2291 - Modeled 2290, 2291
Note: Converted by Virginia Midland Shops from EMD SD35 

Yard Service: 1500 HP and 2100 HP Gensets
EMD MP15DC (1500 HP - EMD 12-645)  
#151-153 - Modeled 153
Note: Original owners from EMD

NRE 3GS21B (2100 HP - Cummins Diesel)
#2101-2104 - Modeled 2101
Note: These units replaced aging EMD GP15-1s which were sold off. 


NRE 3GS21C (2100 HP - Cummins Diesel)
#2110 - Modeled 2110
Note: NRE kit being built at MCIS Mount Pleasant shop on frame / trucks of EMD SD35


As my model railroad stays in the modern era the locomotive fleet is constantly being upgraded and changing to the demands of the system. The next few years will see some changes to the roster:

  • EMD GP30s rebuilding into slugs to be mated with EMD GP38-3s
  • EMD SD45-2s rebuilding into EMD SD32ECOs
  • Possible further acquisition of high horsepower locomotives SD70M-2 or ACe???

All information is fictional and is not endorsed by actual locomotive manufacturer.

Thank you to Fred Fogelsinger and Shannon Crabtree for the great job painting, detailing, decaling, and weathering my Michigan Interstate diesel fleet.

GM